Satisfactory Production Bottleneck: Why Your Line Stops
Find your Satisfactory production bottleneck with symptom-led checks for blocked outputs, missing inputs, slow belts, machine settings, and power faults.
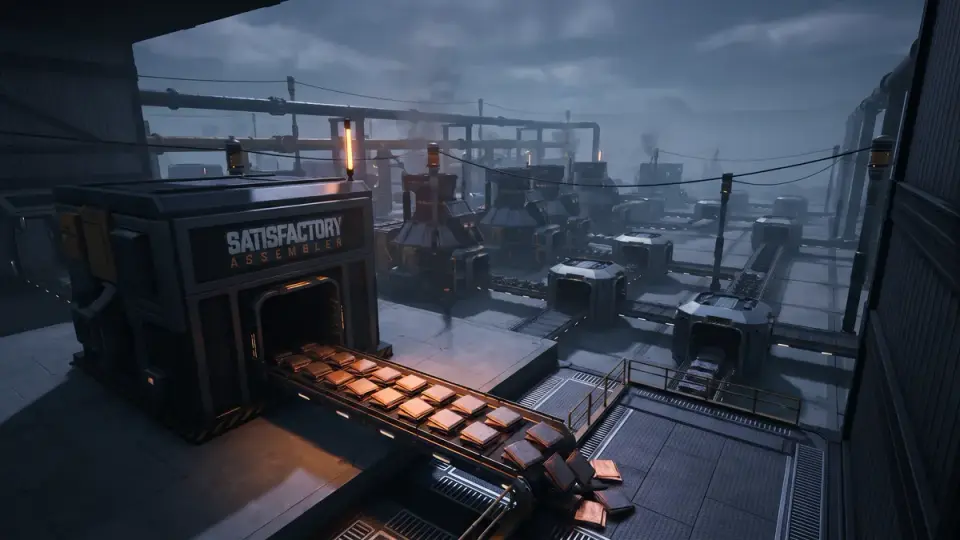
A stopping factory does not automatically need to become a bigger one. Most Satisfactory production bottleneck problems live at a single handoff: a full container, a starved input, one slow belt segment, a wrong recipe, or a tripped fuse. Stand at one stopped machine, follow one item, change one thing, and watch the result before you tear anything down.
Broken lines often run just long enough to look fixed. That is why every branch below pairs a test with a minimal fix and a retest.
Quick take
- Did several machines stop at once? Start with the power graph.
- Is the output slot packed? Start with the destination.
- Is one input slot empty? Start with that ingredient's upstream chain.
- Is supply piling up somewhere that never reaches the machine? Start with the narrowest belt or lift on the route.
- Are the inputs stocked but nothing is crafting? Start with the recipe, standby, and clock settings.
Find the Satisfactory production bottleneck at one stopped machine
These checks apply to solid-item lines from Tier 1 through Tier 4: miners, smelters, foundries, constructors, and assemblers connected by belts and lifts. Fluids come up only in the power section, because water for coal power is the one fluid most Tier 3–4 bases depend on.
If you are still building your first lines or deciding on milestone priorities, my Satisfactory beginner guide covers setup and progression. Use this one when the factory already exists and something inside it keeps stalling.
Satisfactory is rated medium difficulty, and the catalog marks it beginner-friendly: Yes. Its feature list (3d factories, exploration, co-op, vertical building) also explains why its bottlenecks hide well. A first-person view and stacked floors mean the belt you see is rarely the whole route.
The diagnostic map
Pick the machine closest to where you noticed the problem, open its panel, and work down this list:
- Did several machines stop at the same moment, including machines on unrelated lines? If yes, go to "Several machines stopped together." If no, continue.
- Is the output slot full, or is the belt leaving the machine packed and stationary? If yes, go to "Packed output." If no, continue.
- Is any input slot empty or repeatedly running dry? If the belt feeding it is also empty all the way back, go to "Empty input." If items exist upstream but arrive thinly, go to "Supply exists but does not arrive." If no input is empty, continue.
- Are the inputs stocked and the output clear, but the machine is not completing cycles? Go to "Enough materials, wrong configuration."
Symptom, test, fix, retest
| Symptom | Confirming test | Smallest fix | Retest |
|---|---|---|---|
| Output slot full | Can the destination accept items? | Restore destination or consumer | Output slot drains |
| Input runs empty | Trace ingredient upstream | Reconnect or add one producer | Input holds over cycles |
| Supply piles up early | Compare belt before and after each junction | Upgrade the narrow segment | Far end stays fed |
| Inputs full, no crafting | Check recipe, standby, clock | Change one setting | Repeated cycles complete |
| Many machines dark | Read the power graph | Restore power, then reset fuse | Circuit holds at full load |
Packed output: when the destination is the problem
A full output slot means the machine finished its work and has nowhere to put the result. Before you repair anything, check whether anything is broken. If the container holds a few thousand Reinforced Iron Plates and your next milestone needs a few hundred, the idle machine is a line that has finished its job.
A full destination can mean the line has done its job.
Choose a repair when delivery falls short of your goal; idle time alone is not the target.
Support Game FoundryIf delivery does fall short, follow the finished item downstream, belt by belt, until you reach the first thing that is not moving. That stuck point is usually a container with no free slots, a belt end that never snapped to anything, or a downstream machine that has stopped for its own reasons. In the third case, that machine becomes your new starting point on the map.
Test: Open the destination container and check for free slots, or pull one stack out by hand. If the belt starts moving and the stopped machine resumes, you have confirmed the cause.
Smallest fix: Restore the destination you intended. Reconnect the loose belt, restart the downstream consumer, or add a second container if this stockpile genuinely needs to be bigger. An AWESOME Sink can absorb overflow and pay you in coupons, but that is a design choice rather than a repair.
Retest: Watch the output slot. It should drain and stay below full while the machine completes several cycles in a row.
Satisfactory missing input: tracing an empty ingredient upstream
An empty input slot sends you the other way, upstream. The machine panel lists every ingredient the active recipe needs, with a per-minute rate beside each. Find the slot that is empty or drains between deliveries, then follow that ingredient back one machine at a time.
The real cause is often several machines away. An assembler short on Screws may have a working Screw constructor that is starved of Iron Rods, which are in turn short on Iron Ingots. Keep walking upstream until you reach the first machine that has everything it needs. The shortage starts at the link just after it.
Absent connection versus weak supply
If the upstream belt is completely empty and the producer's output slot is full, the connection is missing: a belt on the wrong port, a lift pointing the wrong direction, or a splitter output that leads nowhere. If items arrive but too few of them, the supply is too small for the demand.
Controlled test: Compare the producer's output rate in its panel with the consumer's input rate. The default Reinforced Iron Plate recipe asks for 60 Screws per minute, while one Screw constructor at 100% clock makes 40 per minute. That gap never closes on its own. The assembler can look fine for a while after a restart and then starve again, because it is drawing down a buffer.
Smallest fix: Reconnect the missing link, or add one producer at the short stage. Check the stage behind it as well. Two Screw constructors need 20 Iron Rods per minute, and one Rod constructor makes 15.
Retest: A buffer that fills right after a fix is evidence, not proof. Come back after several cycles. The input count should hover around a level instead of trending toward zero.
Satisfactory conveyor bottleneck: supply exists but does not arrive
This branch fits when items pile up near the source but arrive thinly at the machine. The route between them is the suspect, and you have to check all of it, not just the segment you can see from the factory floor.
Walk the whole path: every belt, every lift, every splitter and merger. A route's throughput equals its slowest piece. Mk.1 belts and lifts carry 60 items per minute, Mk.2 carry 120, and Mk.3 carry 270. One leftover Mk.1 lift in the middle of a Mk.2 line caps everything behind it at 60, and multi-floor builds hide these on the floor you never visit.
Shared segments matter most. A merger that feeds two streams onto one belt puts their combined demand on a single capacity. A main line feeding a row of machines through splitters carries the combined demand of every machine on it.
Startup distribution versus a real restriction
A manifold, meaning one belt feeding a row of machines through splitters, fills from the front. The first machines take items until their input buffers are full, and only then do items pass on to the last machines. For the first few minutes the far end starves even on a perfectly sized line.
That is a startup effect, not a bottleneck. It becomes a real restriction only if the far machines still starve after every buffer has filled. Delivery can never exceed the smallest of three numbers: sustainable upstream supply, the narrowest capacity on the route, and the combined demand of everything downstream.
Test: Look at the belt just before and just after each junction or lift. If it is packed before and sparse after, that piece is the restriction.
Smallest fix: Upgrade that segment or lift to a tier that clears the demand, or split the load across a second route.
Retest: Let the manifold settle, then confirm the last machine on the line stays fed over repeated cycles.
Satisfactory machines not producing: wrong configuration
Sometimes the inputs are stocked, the output is clear, and nothing crafts. The machine is doing what you told it to do, which is not what you meant.
Open the panel and check four things, in this order:
- Recipe. Is the selected recipe the one this line was built for? Alternate recipes change the ingredients. Cast Screw, for example, takes Iron Ingots instead of Rods, so a Rod belt will never feed it.
- Standby. A machine left on standby keeps its buffers and does nothing.
- Clock speed. An underclocked machine runs and consumes proportionally slower. Its demand equals the recipe rate multiplied by the clock percentage, and the panel shows the resulting per-minute figures.
- Delivered items. A stray item on a mixed belt that the recipe does not accept will sit at the input and block everything behind it.
Smallest fix: Make one correction. Change the recipe and the clock at the same time and you cannot tell which change mattered.
Retest: Watch the machine complete repeated cycles, with its productivity reading climbing and holding.
Satisfactory production line keeps stopping everywhere: check power
When machines on unrelated lines go dark together, skip the single-machine checks and go straight to power. Open any generator on that circuit and read its power graph. Compare current production with consumption and with max consumption, which is the draw if every connected machine runs at once.
The graph separates four causes:
- Tripped fuse: Consumption exceeded what the circuit could produce, so everything on it stopped. It stays down until you reset the fuse from a generator's panel.
- Inadequate generation: Max consumption sits above capacity. The fuse will trip again whenever enough machines run at once.
- Generator inputs interrupted: Biomass Burners ran out of fuel, or coal power lost its Coal or water. If your Water Extractors share the circuit they power, one trip stops the water and the generators cannot restart. Few Tier 3 mistakes waste more time.
- Disconnection: One group is dark while the rest of the base runs. Follow the power line back to the missing pole or wire.
Smallest fix: Restore generation first, by refueling, reconnecting, or adding generators. If capacity is short, temporarily put lower-priority machines on standby. Then reset the fuse.
Retest: Watch the circuit under full load, with every machine running, and confirm that max consumption stays below capacity.
Worked example: improving Satisfactory production efficiency at a shared route
This example uses illustrative readings, not a specific recipe or belt setup. Two consumers each require 45 items per minute at their chosen settings. Upstream supply is 90 items per minute, but the shared route feeding both carries at most 60.
Step 1: Demand. 45 + 45 = 90 items/min.
Step 2: Delivery. Delivery is limited by the smallest of supply, route capacity, and demand: min(90, 60, 90) = 60 items/min.
Step 3: Deficit and coverage. 90 − 60 = 30 items/min short. Input coverage is 60 ÷ 90 = 66.7%, so the consumers spend about a third of their time waiting.
The tempting move is to add a third producer. Supply would rise to 135, but delivery would stay at min(135, 60, 90) = 60. You would gain a backed-up belt and nothing else, because supply was never the limit.
Step 4: Repair the route. Raise the shared segment, including every lift on it, to an available capacity of at least 90. In this example, a tier rated at 120 clears it.
Step 5: Recalculate. min(90, 120, 90) = 90 items/min. The deficit is 0 and coverage is 100%. The route now has 30 items/min of headroom, which is fine because demand, not belt capacity, sets the target.
The decision changes from "build more" to "fix one belt." Retest only after distribution settles, since both consumers' buffers must fill before the numbers mean anything.
Retest before you rebuild
A repair counts when sustained delivery meets the demand you set, not when a machine flickers on or every building shows 100% utilization. Change one variable, then step back:
- Let startup buffers and manifold distribution settle.
- Watch the repaired handoff over several full production cycles.
- Check the destination's delivered rate against your intended demand.
- Stop when that rate holds.
Retest before you rebuild
The verdict
- Leave it alone when delivery meets demand. A line that meets demand and then idles on a full container is not a fault.
- Expand the constrained stage when one handoff falls short. Upgrade that belt, add that one producer, and leave the rest of the starter base standing.
- Redesign only when the same structural problem keeps returning after clean single-variable tests, such as a manifold that can never be fed or a circuit that trips whenever the line runs at full load.